How to Play verilogTown
If you haven't downloaded the game please go to here.A quick video describing some of this:
Goal of the Game
In verilogTown, your goal is to write the Verilog at each of the intersections to help get all the cars through the town safely. This will require some thinking and simulation to do successfully. The best scores are recorded here, and require you to get all the cars through the city, to the exit they want to go to. If you achieve this, then your final score is how fast you did this.Playing Level 1
After starting the game you will be at the main menu. This should look like the picture below:
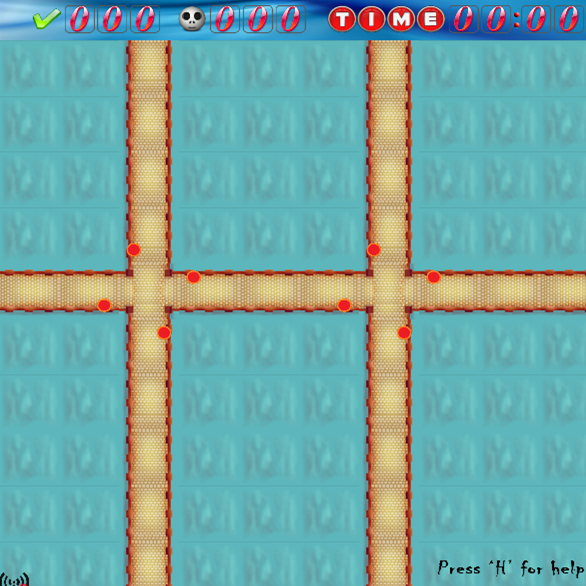
For the purpose of this tutorial we will use Level 1. Click Level 1, and you will see the following:
At the top of the screen the current score is recorded. First, we show the cars that successfully get through the level; second, is the cars that failed to make it to where they wanted to go, and lastly, is the time for the simulation.
Note that the skeleton icon is for two types of failure.
- If two cars crash, they will add 2 to the skeleton since two cars were destroyed.
- If you use the special signal types (forward, right, and left) they can force cars down streets so that they can't get to their chosen destination. This is considered a fail and adds 1 to the skeleton score.

These buttons do the following:
S - Starts and resumes the simulator meaning the cars will enter the city. Once the simulation starts you will not be able to edit the Verilog code.
X - Pause the simulation.
M - Go to the main menu. Simulation must be not started or complete.
R - Restart the simulation. You will need to press "S" to start the simulation again.
Q - Zoom in on the map.
A - Zoom out on the map.
Cursor Keys - Move around a zoomed in map.
H - The help button that brings this screen up and down (simulation must be stopped).
Press the "H" button again to get rid of the help screen. Let's simulate the level to watch the cars drive through the town. To start the simulation press the letter "S". At the 6th second of simulation you might see something like this (to pause press "X"):
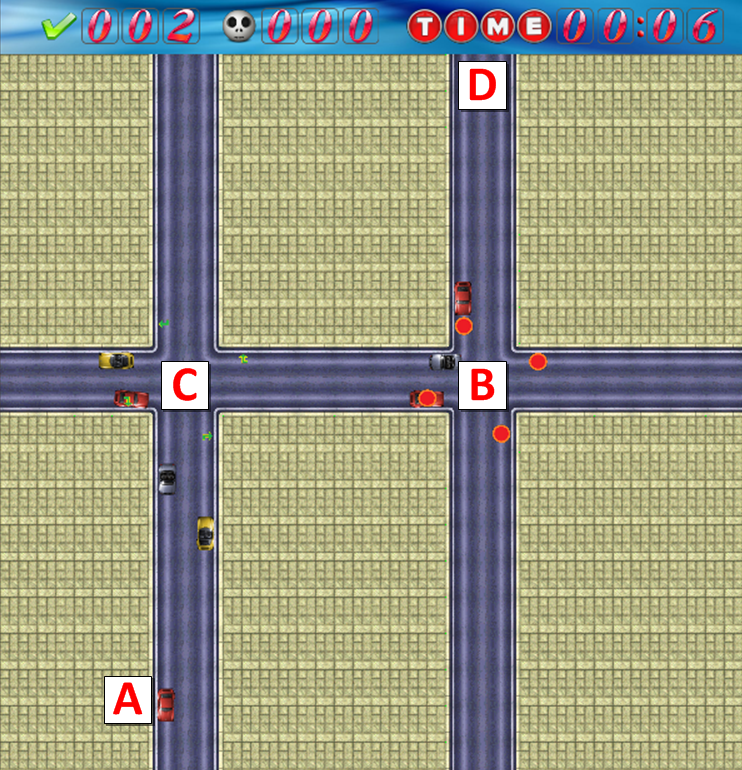
A few things about the simulation that you are seeing marked on the image:
A - this is a car exiting the map. All cars stay in the right lane (as they do in places such as North America, China, and Europe).
B - this intersection has one car leaving and one car waiting at a Red light (stop). Cars obey signals and will not crash into a car in front of them heading in the same direction.
C - this is another intersection that has all force turn right signals. The red car will follow the signal if it can and turn right and exit at A. If this was not where this car wanted to go, you would lose a point. (Note: that when you simulate the level, this will not happen as the level is started with a simple Combinational Verilog template).
D - this is one of six entrance exit points for cars.
Once the simulation finishes your score will come up
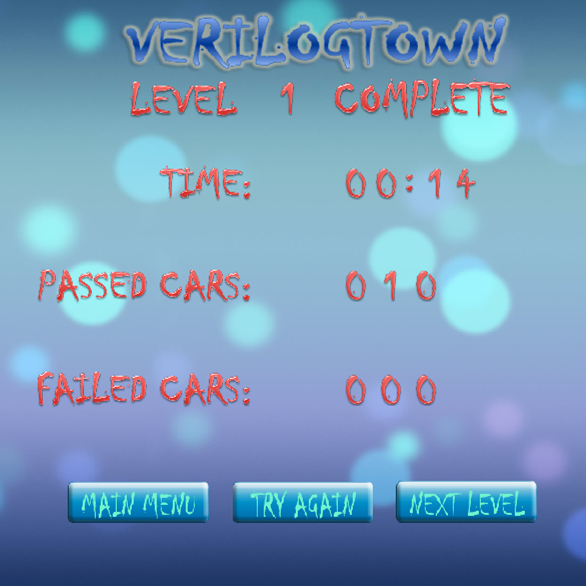
This screen shows how many cars you got safely through the city, how many failed, and how long it took. To get a high score you need to minimize time and have no failed cars.
Let us go back to the start of Level 1. You'll need to click "Main Menu" and Level 1 buttons to get back there.
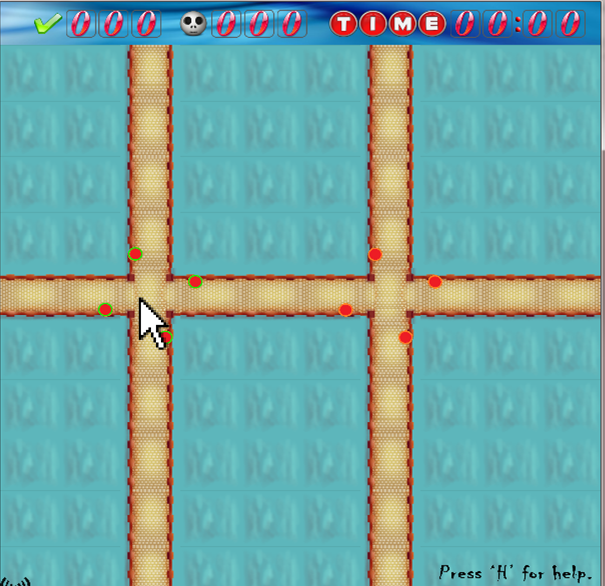
Now we're going to see how you could edit the Verilog that controls a light. Place your mouse pointer over an intersection and you should see the lights around it get highlighted. It looks something like this:
Now click the mouse on the intersection and an editor should open that looks similar to this:

This editor shows the Verilog module that controls the traffic light. To understand the Verilog please go here.
The basic structure of this tool is:
A - this is the file menu and tool buttons. This can save, compile the Verilog, undo, find, and simulate the existing Verilog.
B - this is the current Verilog module for this light. You can edit the Verilog design here, but you should know what you are doing.
C - this is where all messages from the tool will be displayed including error messages and simulation results.
Saving in the editor
To start, we will click a few buttons. First click (save button). This will
save the file and you should see the message "Saving Complete" in
section C.
(save button). This will
save the file and you should see the message "Saving Complete" in
section C.
Compiling in the editor
Next, click (compile button). This will
compile the code and will supply a message that tells you which file is
compiled. Since there are no errors in this module, the
compile is considered successful. Let's add an error to see what will
happen. Change the line
(compile button). This will
compile the code and will supply a message that tells you which file is
compiled. Since there are no errors in this module, the
compile is considered successful. Let's add an error to see what will
happen. Change the line output [29:0]debug_port;
to
output [29:0]debug!!port;
and click
again.
This time you will get a message such as:Error at line 4:18 at [@46,116:116='!',<64>,4:18]: mismatched input '!' expecting {',', ';'}
Note, that error messages can be terse and hard to understand. Also, verilogTown has a compiler tool, but it is by no means a powerful compiler such as the ones in Altera's Quartus (you might consider using there tool when you have an error that you can't figure out using our tool). Regardless, the key piece of information is the "at line 4" that tells you the error is on line 4 (4 lines down from the top).
Simulating in the editor
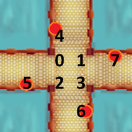
We provide a simple simulator in the editor so you can test how the light will work. The key to this is on the toolbar called "Internal Sensors:". Each traffic light has 8 sensors in it to tell the Verilog if a car is there. In the Verilog code you will see an input signal called "input [7:0]sensor_light". Above that line of code there is a comment that describes which index value corresponds to which sensor in the light. For example, sensor_light[3] corresponds to the bottom right internal sensor. See the image below which shows the number and location of the sensors:
So, if we wanted to simulate a car waiting to go south, we would enter the binary sequence "00010000" into the field after "Internal Sensors:". Do this and press
 (simulate one clock cycle button). If everything worked you will get a message like:
Simulation Cycle
Clock Cycle:5 Sensors Light: 00010000 General Sensors: 000000000000000000000000000000
Out0 Val:0
Out1 Val:4
Out2 Val:0
Out3 Val:0
DebugVector:10000
This shows what happened in the traffic light. In particular, Out1 has a value of 4, which corresponds to the Go signal (see understanding Verilog). Also, the DebugVector shows a value and can be used to debug the internals of your design.
One thing to understand with this simulation verctor is the order. "10000000" would set sensor_light[7] or what we call the most-significant-bit to 1 and all the rest of the bits to 0.
Verilog Templates
We have included two Verilog templates to start from in the editor. This is a menu item and you can choose either the combinational or sequential as a starting point. The game, as downloaded, has every traffic signal of every level set to the combinational template, which is a good starting point. Load up template combinational to reset everything we've done.
Exiting the Editor
Before exiting the editor you should click
again to make sure the source compiles. Now, exit the window.
If you haven't saved you will be asked if you want to save. Click "Yes". Now you can go back to the town and try to simulate again with your new design. Can you beat the best?